Steps
1. Click on the package drop-down menu

2. Select create a new package.

3. Fill in the details of the package.
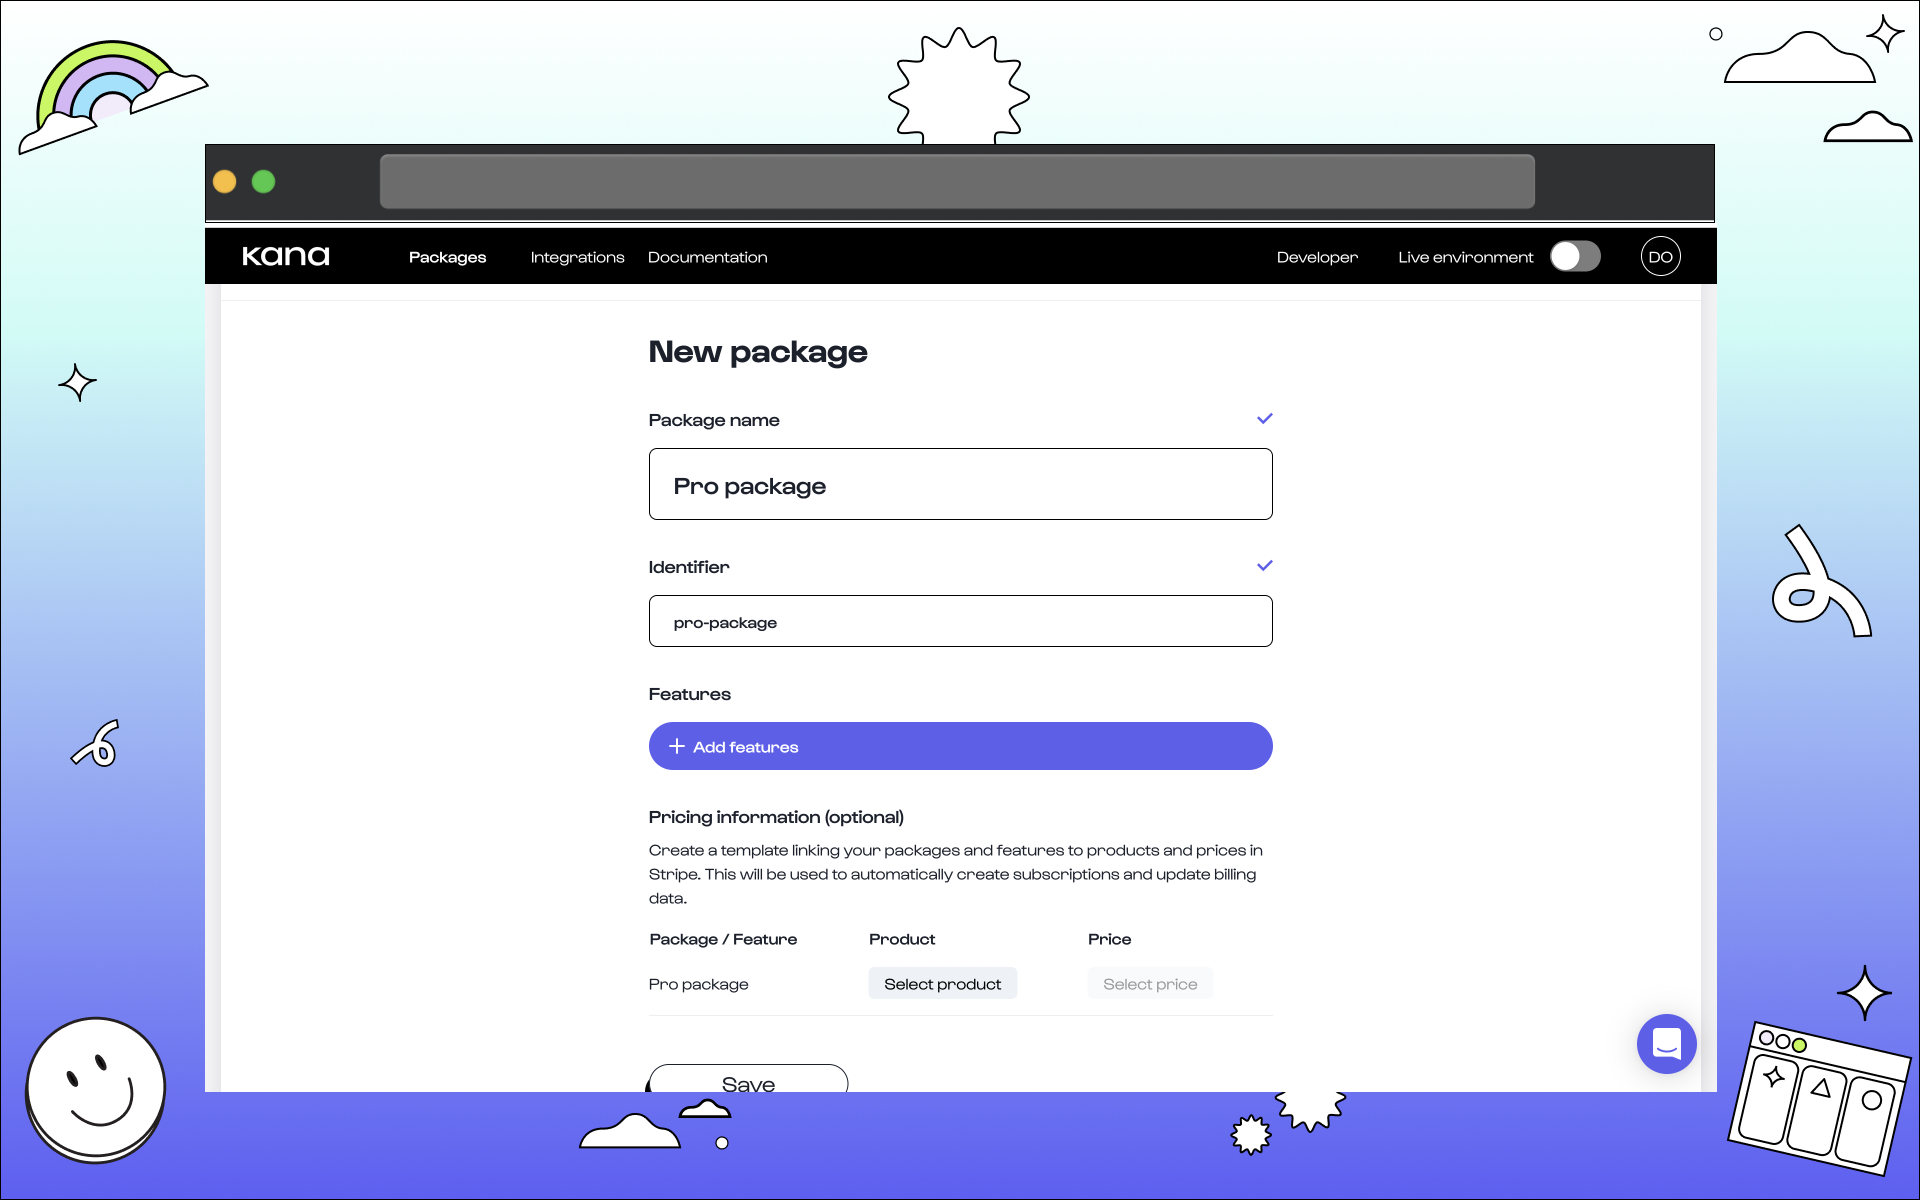 The following information is needed:
Package name.
This is the name of the package that will be visible on the Dashboard. Make it user-friendly so that it reads as you’d present to your users and that it’s easily identifiable in the product later.Identifier.
This is the unique identifier of the package. When you integrate Kana into your product, this is theid that you will need to provide when making calls related to the package. See more on the package object here.
Is addon Checkbox.
This marks if the package is a base package or an add-on package. If the checkbox is ticked, then we will consider it an add-on package. If it’s unchecked, then it will be a base package. See more on package types here. See more on package types here.4. Add features to the package.
a. Click Add a feature.
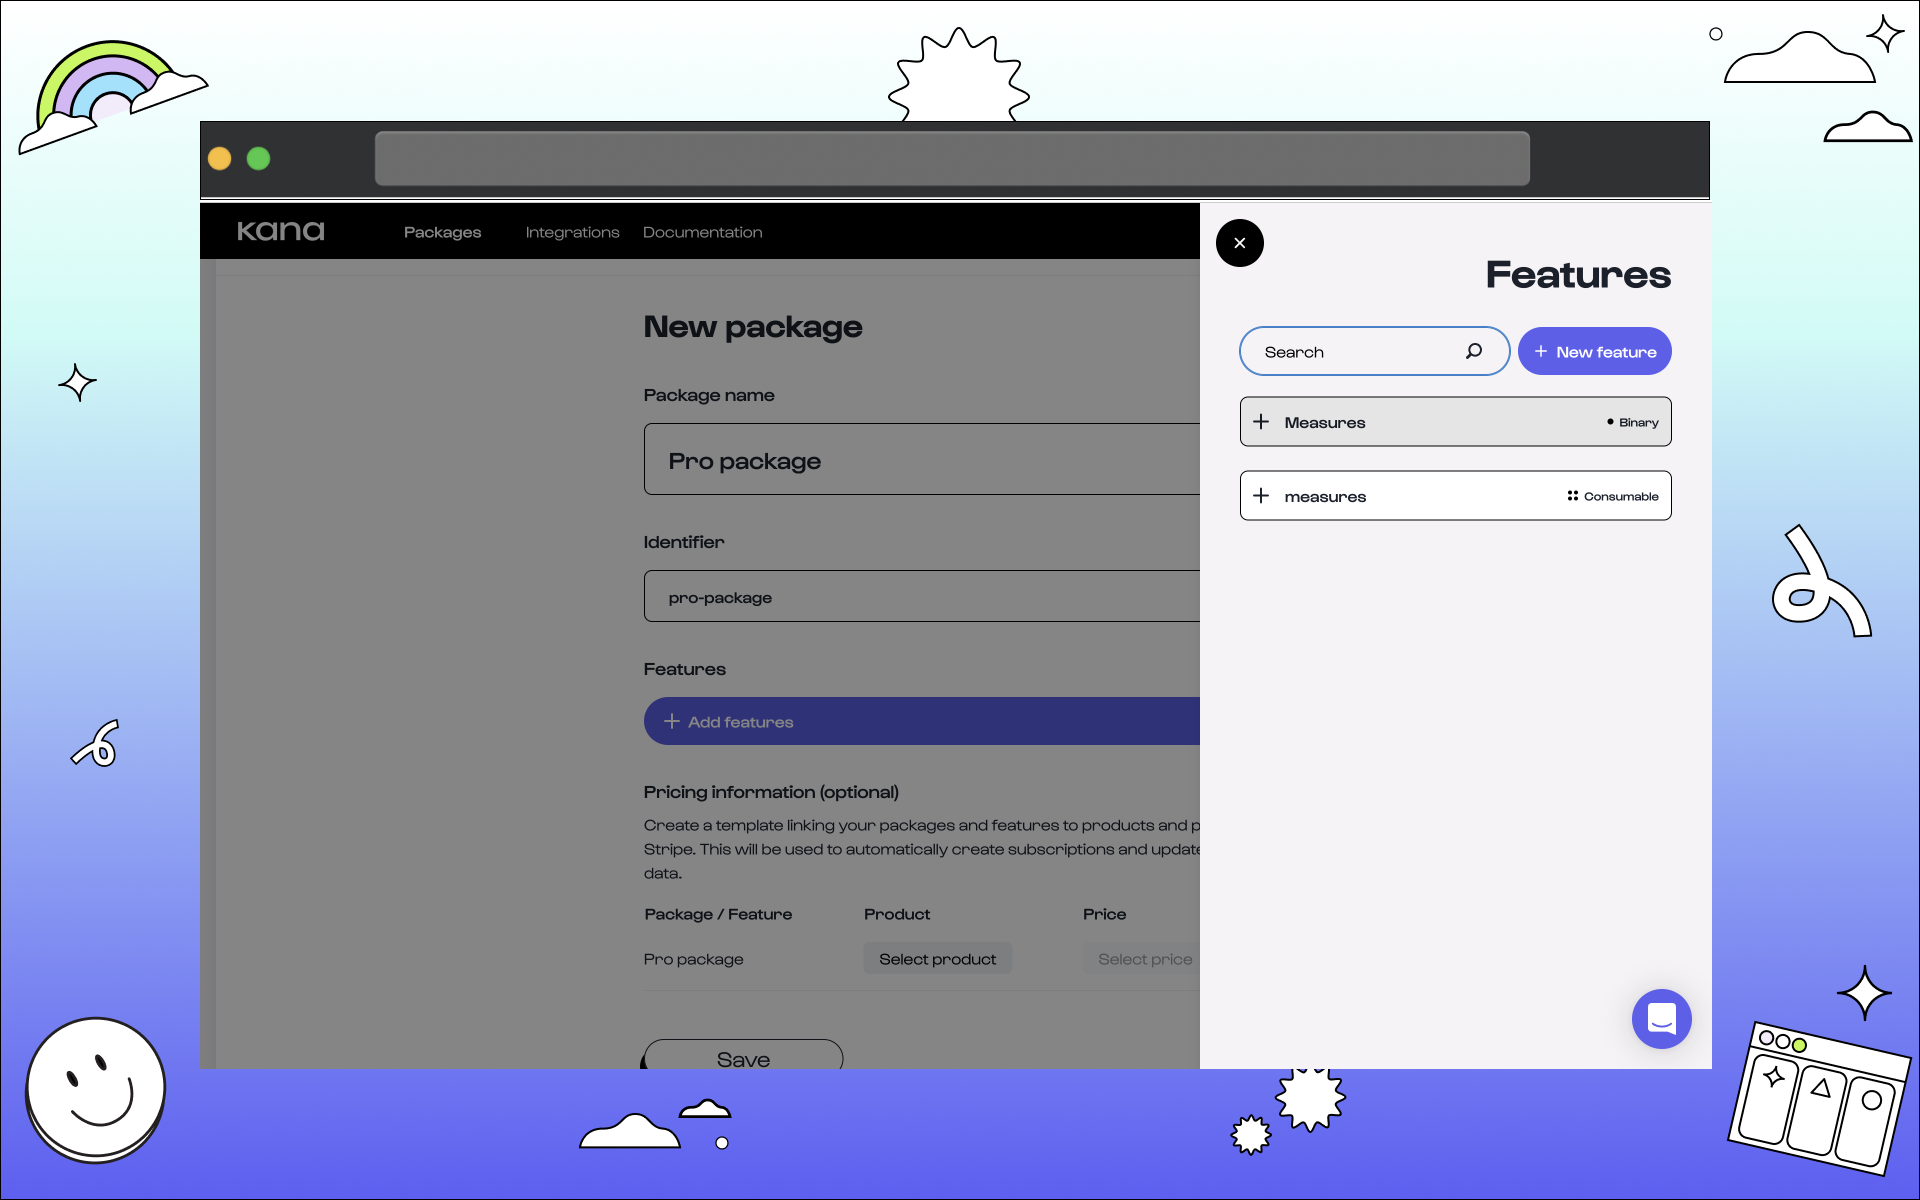
b. Select features to add to the package.
You can either:- Create a new feature: Click Create a new feature to do so. See our guide on creating features for more.
- Select an existing feature: Click on any present features from the list.
C. Click on the feature to add to your package.

5. Pricing information section (optional).
a. Click Link, create new and add the correct information.

Stripe product name.
This is the name you are calling your product. This can be anything you decide to choose.Amount.
This is how much your product will cost.Currency.
Choose selected currency based on your location.Billing period.
You can decide what billing period best suits your company.b. Select done to connect.

Make sure to repeat Step 5 for every single feature you have added to a package to ensure the details of the feature within the package match what they should.
6. Click Save.

What’s next?
Congratulations 🎉 You’ve created a package in Kana.